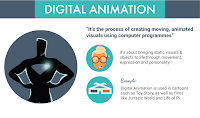
Today you will be using your scene to create a 75-slide (minimum) animated scene. Eventually you will EXPORT your slides as Images (JPEG) and using MS Movie Maker to create a Digital Animation with Music, Titles, and Credits.
FOR SOUND EFFECTS USE FREESOUND.ORG and AUDACITY!
STEP BY STEP Audacity Instructions:
Link to Audacity Tutorial:
Step 1. Open a website (YouTube, Freesound, etc.) with the media you want a sample of.
Step 2. Click on the Audacity shortcut from the Windows Programs Button.
Step 3. Once open, you will need to click each window so they are "split-screen" (you can view both windows on the computer screen at once).
Step 4. Make sure your settings on Audacity are set to record from "Windows WASABI", Speakers both Input and Output, and Stereo Quality (not Mono)!
Step 5. Press RECORD (Red Dot) button on Audacity, then quickly press PLAY button on the Internet Media. You should see the levels on Audacity jump to match the playback on your Internet Media. When you have recorded enough media for your project, click STOP (Black Square) button on Audacity, and stop your Internet Media playback.
Step 6. Click FILE and EXPORT on Audacity. Choose either MP4 or WAV from the list, click/enter the location you are saving the file too (preferably your desktop for easy reference), and click SAVE. This will export your file for use in other media. You should preview the file in Audacity prior to exporting it if you like, or once exported you should click the new file created and make sure it plays on your computer's music program (ITunes, MS Media Player, VLC, etc.)
Mr. Scribner's Digital Animation Examples:
MAKE YOUR DIGITAL ANIMATION INTO A MOVIE CLIP USING OpenShot:
Step 1. Open your project in Google Slides. Click FILE, Click DOWNLOAD, Click Microsoft PowerPoint. Once Downloaded, Open the file in PowerPoint.
Step 2. With PowerPoint open, click FILE, EXPORT and choose CHANGE FILE TYPE. Click on JPEG and click SAVE AS. Choose your Desktop as the destination, adjust the filename if necessary, and click SAVE. When the window appears, click ALL SLIDES. A file folder should appear on your Desktop. Your slides are now images in that folder.
Step 3. Open the folder with your slide images. Select all of them. Open OpenShot on your computer. Make sure that both of these are in split-screen mode. Click all of the slides and drag them into OpenShot. You will be asked if you want to IMPORT them as an Image Sequence (Video Clip), Click YES. You can now drag your Video Clip down into your project.
Step 4. Using OpenShot Video Editor, you must create a Digital Animation "Short-Film" by making each image "flash" for around 1/2-second each. This will give the impression that the images are animated. You should add Titles, Credits, and a short burst of music to finish the film.
- Once OpenShot is started, drag your sound effects and music files into the PROJECT FILES Window.
- Drag your images (individually or as an image sequence/video clip) into the PROJECT FILES Window.
- Drag any video clips, or other media (Production Logo, or Video Logo from you previous projects) into the PROJECT FILES Window.
- Create any TITLES/END-CREDITS you might need in OpenShot from the menu items. For this specific project you only need to add the Titles outlined below.
- Assemble your PROJECT Files in Tracks 0-4 as follows:
- Titles and End Credits in Track 4
- Single Images in Track 3
- Video Clips in Track 2
- Audio Sound-Effects in Track 1
- Music / Background Audio in Track 0
- Place/Adjust your files any way you like. Add Transitions/Effects as needed. Preview your project in the window provided (Preview May Not Work Right). NOTE: If you play the project and cannot hear the audio, Click SAVE Project (to Desktop), Close/Exit OpenShot, Restart OpenShot making sure your headphones are not plugged in. Once started, choose FILE and RECENT from the menu, and click on the first choice. Your video project should open, and the audio should play in the preview through the speaker on the computer you are using (DO NOT PLUG IN HEADPHONES AGAIN UNTIL AFTER YOU EXPORT IT).
- Once your Video Project is complete, click FILE and EXPORT. In the window that pops-up make sure you change the name of your project, and choose the Desktop as the Export location. YOU NEED TO EXPORT YOUR PROJECT AS AN MP4 FOR CREDIT.
- Once your PROJECT is on the Desktop as an MP4 file, Open your Google Drive and (using split screen again) click and drag the file to your Google Drive. You will see the Upload progress in a pop-up window. Once it is uploaded to your Google Drive, double-click the file to open it. In the upper right corner you will see three (3) dots, click them, click SHARE, and enter Mr. Scribner's (hscribner@ccs.us) email to submit your project for credit. MAKE SURE YOU UPLOAD THE MP4 VIDEO FILE FOR CREDIT, NOT THE OSP (OpenShot Project File).
YOU MUST IMPORT AT LEAST ONE (1) SOUND EFFECT/MUSIC AND ADD IT TO THE ANIMATION PRIOR TO SAVING IT! (You can use freesound.org and audacity to record sound effects or music for use in this project.)
Your TITLES should include the Name of the Video and "by (Your Initials)
Have Fun with this project. If you would like to know more, here is the original link to 50 more digital animation websites at TEACHTHOUGHT.COM (Click Here)! Good Luck!


RUBRIC FOR DIGITAL ANIMATION PROJECT
ACADEMIC/LEARNING OBJECTIVE
Scholars will learn the basics of Digital Animation. Scholars will be able to create "mini" animations using an online application. Scholars will also start creating the basic drawing that will be used for a future "line-art" digital animation project. Scholars will be able to complete a Constructed Response about the "History of Animation" and discuss what they like, or do not like about the project.
STUDENTS WILL ENTER THE CLASS QUIETLY AND BEGIN WORKING!
Scholars will sign into Google Drive as they enter the class. Scholars will read all directions on this post thoroughly. Scholars will review the examples linked above to determine the type of movie they are interested in making. They will need to create a short (3-9 second) video clip, with at least one sound effect, for credit. When complete, they will UPLOAD both the RAW Project, and their FINAL Project to Google Drive and SHARE it with Mr. S for review. The basis for their projects will be created using a single slide in Google Slides that they should create first.
THANK YOU FOR YOUR ATTENTION AND POSITIVE ATTITUDE TODAY!
Standards Covered In This Class
PA 3.7.7 & 11 Section C / ISTE 2011
CSTA Tied With Common Core ELA/Math rev. 2011


Comments
Post a Comment